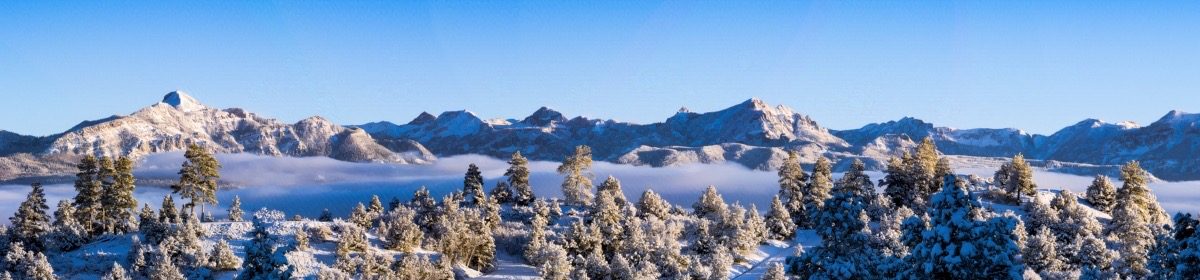
Tips for Photographing Star Trails

One of the topics I did not have time to discuss during last week’s presentation on photographing the Milky Way was making images of star trails. Ian Johnson has published some good tips and techniques for star trail photography over at Digital-Photography-School.com . It’s well worth a read if you are interested in this type of photography. Johnson discusses the basics of star trails, as well as composition, processing, light painting, and the effects of focal length and exposure times. It’s clear that this is an approach that is ripe for lots of experimentation and creativity.

I’ve learned one trick that works well for star trails if you don’t have an intervalometer, or like me, you are too lazy to use the one built into your camera. You do still need a cable release, though. Once you have your camera set up to capture the scene you want, set the camera’s shutter speed to the longest possible, without going into bulb mode. On my Nikon, this is 30 sec. Then, set the camera for high-speed continuous shooting. This is the mode that allows you to press the shutter button down and take photo after photo until you let up. Start the star trail sequence by locking the cable release to “on”. In this mode, the camera will take a 30 sec exposure, then another, and repeat until you unlock the cable release. The camera will fire away, shot after shot, until you stop it (or the battery dies). Using a wide angle lens, you probably want to let it go at least half an hour, and longer is often better. With a 50 mm or longer lens, a shorter time will give you good trails. Johnson walks you through the steps for combining the photos as layers, using the “lighten” blend mode in Adobe Photoshop. This will work in any software that uses layers and has the proper blend mode. I use a dedicated app called StarStax, which has several features such as gap filling (for the brief time between sequential images) and the ability to save out intermediate steps to create a time-lapse movie effect. StarStaX is free, but if you like it, the software’s author would appreciate some money for beer or coffee as a donation.

Another consideration is that you can control the apparent density of trails using the ISO setting on your camera. ISO 1000, for example, will give you many trails close together. ISO’s of 200 to 400 would give you fewer trails, mostly from the brighter stars. It’s another way to control the look of your image.

As with all nightscapes, knowing a little about the stars, planning for a foreground, and using some creativity will help you make great images.

January 2018 Program: Get it Right in Camera!, with Bob Green

Desert Dawn
Desert dawn captured in Arches National Park near Moab, UT. This image will be used as an example of the advantages of RAW processing. ©Robert B Green

The Pagosa Springs Photography Club will meet on Wednesday, January  10, at the Community United Methodist Church, 434 Lewis St. Join us for socializing at 6 p.m., followed by a brief business meeting at 6:30 p.m. before our program. Tonight’s speaker will be club member Bob Green, presenting a program entitled Get it Right in Camera!

Continue reading “January 2018 Program: Get it Right in Camera!, with Bob Green”

Photo Club January Program

The Pagosa Springs Photography Club will resume its regular monthly meeting schedule Wednesday evening, January 14, 2015 in the Pinon Room of the Quality Resort. Join us for socializing at 6:00 PM (drinks and appetizers are available for purchase), followed by the program and short business meeting at 6:30 PM.

The January Photography Club program will be presented by Al Olson. Al is a long-time member and past-President of the Club. He will address the eight critical elements that influence the sharpness of an image, where the details assert their individuality and where each detail is separate and distinct. Some elements that can cause lack of sharpness are under direct control of the photographer while others are affected by the quality of equipment. Examples will be used to show how sharpness (as well as depth of field) varies with lens focal length and with changes in aperture. Tips will be provided on how to capture good “Bokeh” (a function of some lenses), and there will be a brief review of lens design and what to look for when purchasing a lens.

Members are encouraged to bring 10 – 15 photographs of recent photo opportunities on a flash drive or CD, for review and discussion following the program, as time permits.